Originally created by shikasensei: https://civitai.com/models/258054/ultra-upscale
Do you like this? Consider leaving shikasensei a tip: https://www.paypal.com/paypalme/lautaroturina?country.x=AR&locale.x=es_XC
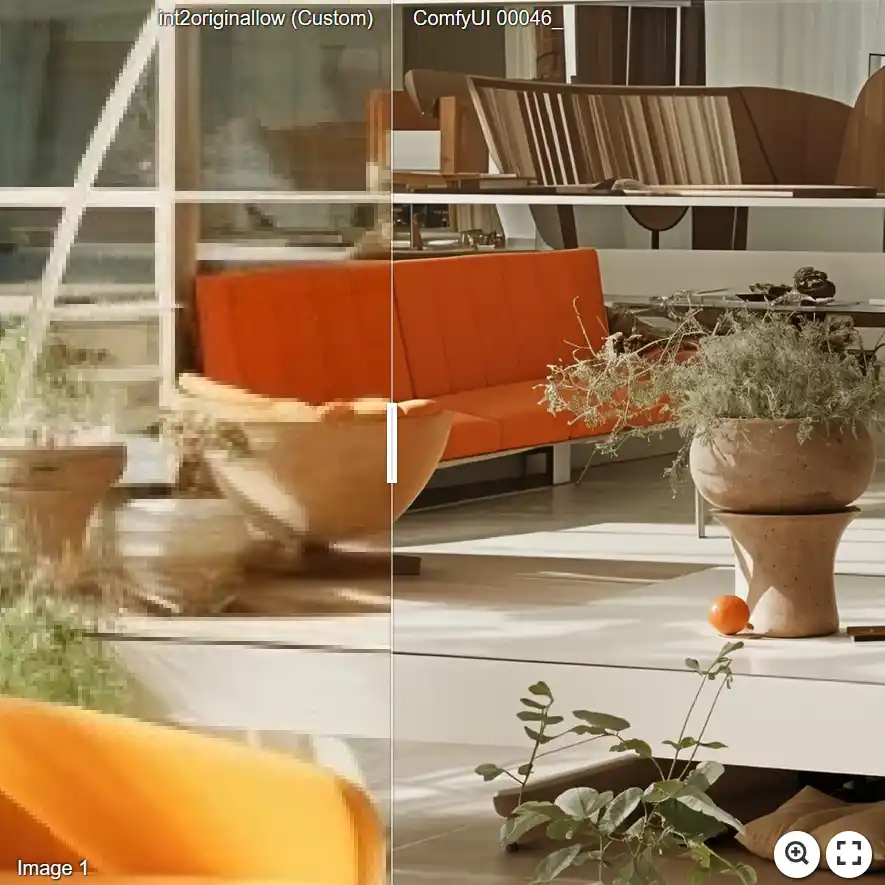
Currently, the workflow is based on the use of Self Attention Guidance for greater consistency. The Tile to SEGS node has been added to be used with Detailer, and Ultimate SD Upscaler is used to refine the results.
The workflow is designed to stay as faithful as possible to the original image by adding a lot of detail. However, if you still want to use it to improve the image without worrying too much about consistency, you can play with the denoise values, both in the Detailer node and in the Ultimate SD Upscale node. Keep in mind that the default values do not always give the best results, so you should experiment with the denoise value a little bit.
Here are some points to keep in mind:
If you want more detail, you have two options:
Increase the denoise of the Detailer or Ultimate SD Upscale, but this may increase the risk of hallucination.
Increase the number of cycles of the Detailer, which is the number of times the tiles are processed (currently set to 2).
To increase the final image size, you need to modify the Upscale Image By values. In the "Ultimate SD Upscale - SAG" node, you will see the "Select Image" option. The value 1 corresponds to the unscaled version, and the value 2 corresponds to the upscaled version. For example, if your initial image is 768x768, if you choose the value 1, your final version will be 3072x3072 and 6144x6144. If you choose the value 2, your final image will be 6144x6144 and 12288x12288.
IMPORTANT: To install the missing nodes, you will have to install ComfyUI Manager. Once installed, you will have to click on "Install missing nodes" and install each node that appears.
Links to examples:
Image 1 - https://imgsli.com/MjMxNzE4
Image 2 - https://imgsli.com/MjMxNzE5
Image 3 - https://imgsli.com/MjMxNzIx
Image 4 - https://imgsli.com/MjM0NDcz
Finally, I would like to thank the developer of Impact Pack, without whom this would not have been possible.